IT评测·应用市场-qidao123.com技术社区
标题:
Centos给根目录扩容教程
[打印本页]
作者:
东湖之滨
时间:
2024-6-8 14:46
标题:
Centos给根目录扩容教程
一、题目与目的
今天在利用nacos服务时发现怎么操纵都会报错,原因是磁盘空间已满,正好偶然间,研究一下怎么对Centos举行扩容
二、解决方法
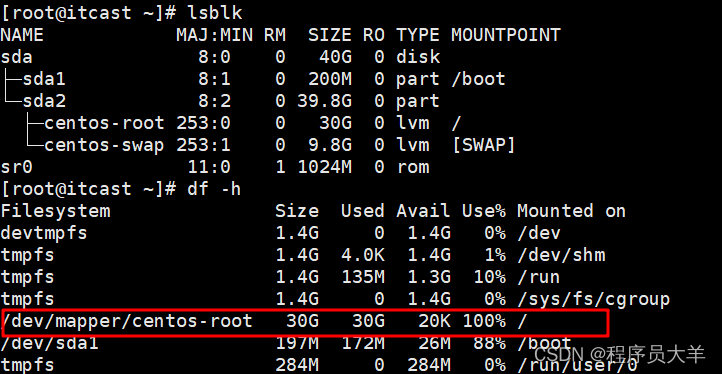
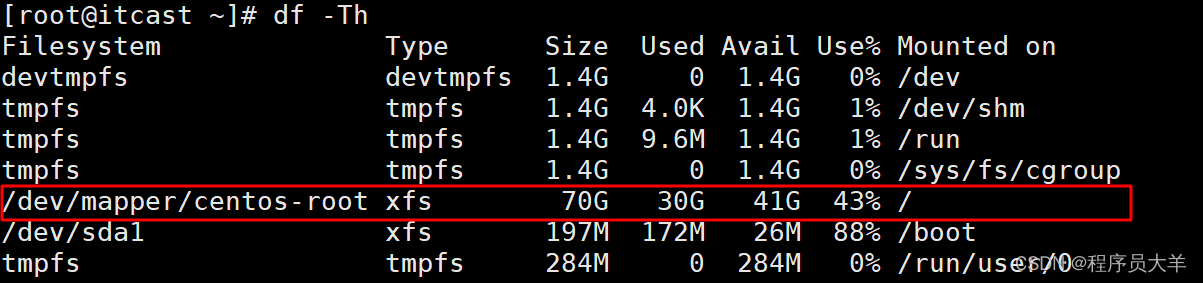
1、首先,通过下令df -h 观察磁盘占用环境
可以发现根目录已经被写满了,这会导致全部写操纵都无法举行
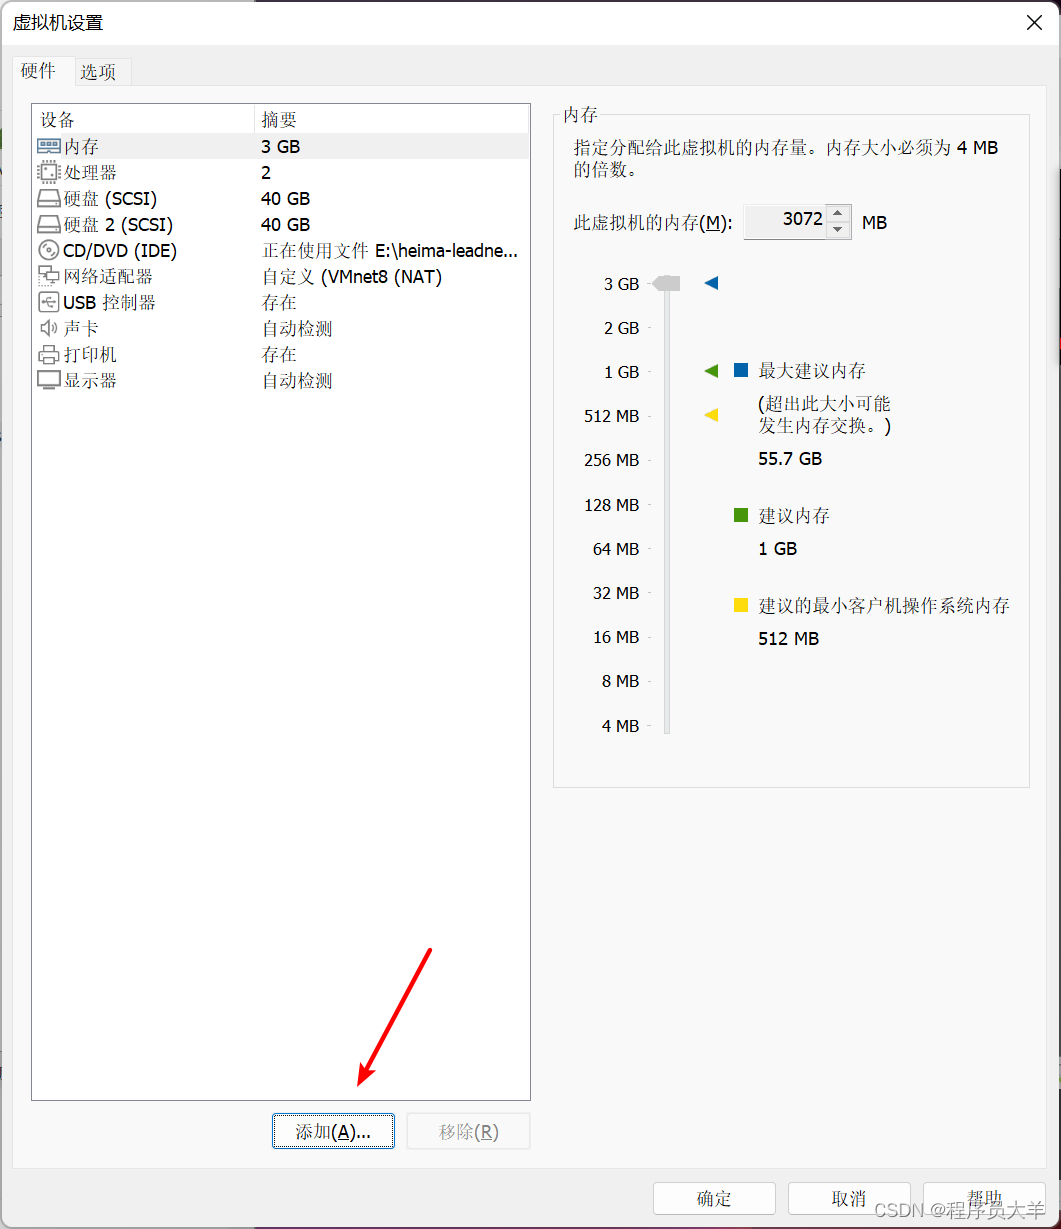
2、先关闭虚拟机,然后在VMware的设置中选择添加一块新的硬盘(不停点下一步就可以了)
我选择了扩容40G
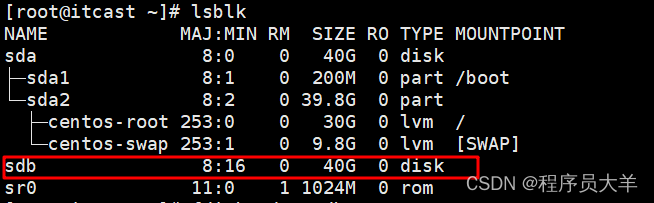
3、重启虚拟机后通过下令lsblk可以发现多了一个分区sdb(原来只有sda)
所以接下来对sdb举行分区操纵
4、对sdb举行分区操纵
[root@itcast ~]# fdisk /dev/sdb
Welcome to fdisk (util-linux 2.23.2).
Changes will remain in memory only, until you decide to write them.
Be careful before using the write command.
Device does not contain a recognized partition table
Building a new DOS disklabel with disk identifier 0xdeeb604b.
Command (m for help): m
Command action
a toggle a bootable flag
b edit bsd disklabel
c toggle the dos compatibility flag
d delete a partition
g create a new empty GPT partition table
G create an IRIX (SGI) partition table
l list known partition types
m print this menu
n add a new partition
o create a new empty DOS partition table
p print the partition table
q quit without saving changes
s create a new empty Sun disklabel
t change a partition's system id
u change display/entry units
v verify the partition table
w write table to disk and exit
x extra functionality (experts only)
Command (m for help): n #输入n新建一个分区
Partition type:
p primary (0 primary, 0 extended, 4 free)
e extended
Select (default p): p #输入p,将分区创建为主分区
Partition number (1-4, default 1): 1
First sector (2048-83886079, default 2048): #默认
Using default value 2048
Last sector, +sectors or +size{K,M,G} (2048-83886079, default 83886079):
Using default value 83886079
Partition 1 of type Linux and of size 40 GiB is set
Command (m for help): t #输入t改变分区类型
Selected partition 1
Hex code (type L to list all codes): 8e #输入8e对应LVM
Changed type of partition 'Linux' to 'Linux LVM'
Command (m for help): w #保存
The partition table has been altered!
Calling ioctl() to re-read partition table.
Syncing disks.
复制代码
再次观察发现有了sdb1分区
[root@itcast ~]# lsblk
NAME MAJ:MIN RM SIZE RO TYPE MOUNTPOINT
sda 8:0 0 40G 0 disk
├─sda1 8:1 0 200M 0 part /boot
└─sda2 8:2 0 39.8G 0 part
├─centos-root 253:0 0 30G 0 lvm /
└─centos-swap 253:1 0 9.8G 0 lvm [SWAP]
sdb 8:16 0 40G 0 disk
└─sdb1 8:17 0 40G 0 part
sr0 11:0 1 1024M 0 rom
复制代码
5、检察根分区的文件系统类型
6、格式化sdb1
[root@itcast ~]# mkfs.xfs /dev/sdb1
meta-data=/dev/sdb1 isize=512 agcount=4, agsize=2621376 blks
= sectsz=512 attr=2, projid32bit=1
= crc=1 finobt=0, sparse=0
data = bsize=4096 blocks=10485504, imaxpct=25
= sunit=0 swidth=0 blks
naming =version 2 bsize=4096 ascii-ci=0 ftype=1
log =internal log bsize=4096 blocks=5119, version=2
= sectsz=512 sunit=0 blks, lazy-count=1
realtime =none extsz=4096 blocks=0, rtextents=0
复制代码
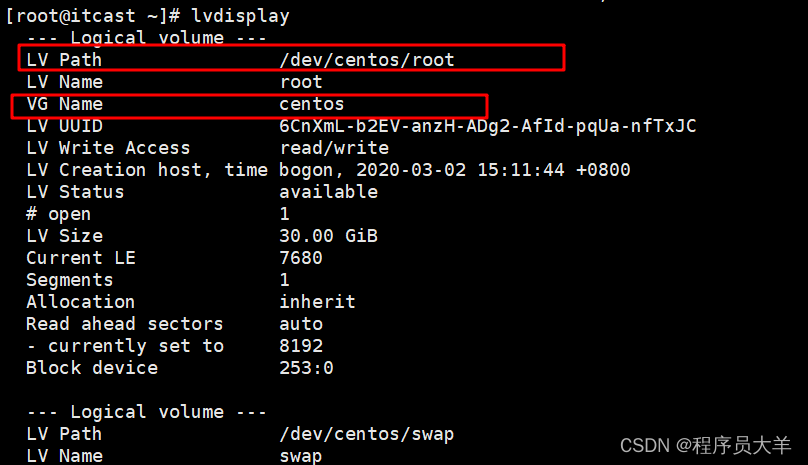
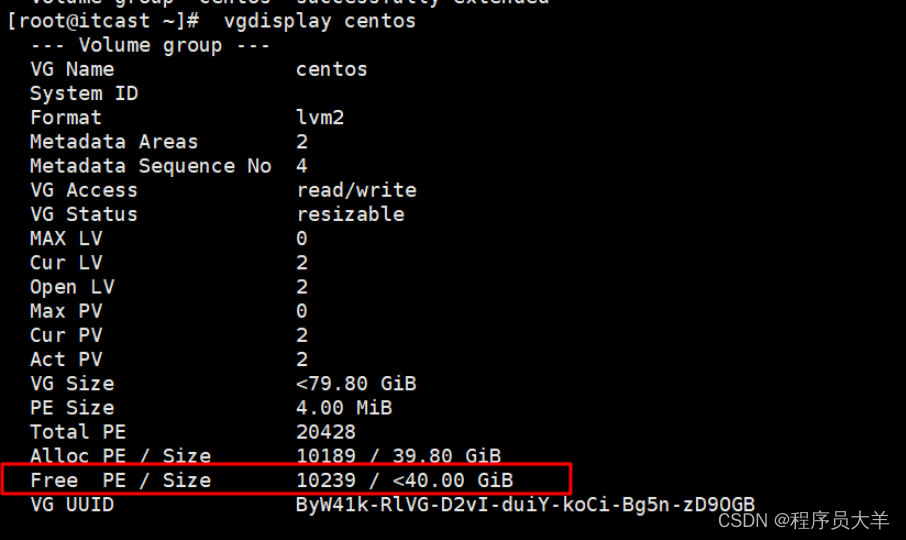
7、检察卷组信息(记住LV Path 和 VG Name)
8、开始扩容
[root@itcast ~]# pvcreate /dev/sdb1 #将sdb1分区变为pv
WARNING: xfs signature detected on /dev/sdb1 at offset 0. Wipe it? [y/n]: y
Wiping xfs signature on /dev/sdb1.
Physical volume "/dev/sdb1" successfully created.
[root@itcast ~]# vgextend centos /dev/sdb1 #将/dev/sdc1卷加入根目录所在的卷组名centos
Couldn't create temporary archive name. ##报错啦!
复制代码
发现报错了,"Couldn't create temporary archive name" 错误通常与 Logical Volume Manager (LVM) 中的缺少或损坏的临时文件有关。所以我们清理一下/tmp目录
执行 rm -rf /tmp/*
[root@itcast ~]# vgextend centos /dev/sdb1
Volume group "centos" successfully extended
复制代码
成功了
接着检察卷组信息 (记住Free PE)
把全部空间分配给根分区
[root@itcast ~]# lvextend -l +10239 /dev/centos/root #10239=free pe
Size of logical volume centos/root changed from 30.00 GiB (7680 extents) to <70.00 GiB (17919 extents).
Logical volume centos/root successfully resized.
复制代码
最后是文件系统的扩容
[root@itcast ~]# xfs_growfs /dev/centos/root
meta-data=/dev/mapper/centos-root isize=512 agcount=4, agsize=1966080 blks
= sectsz=512 attr=2, projid32bit=1
= crc=1 finobt=0 spinodes=0
data = bsize=4096 blocks=7864320, imaxpct=25
= sunit=0 swidth=0 blks
naming =version 2 bsize=4096 ascii-ci=0 ftype=1
log =internal bsize=4096 blocks=3840, version=2
= sectsz=512 sunit=0 blks, lazy-count=1
realtime =none extsz=4096 blocks=0, rtextents=0
data blocks changed from 7864320 to 18349056
复制代码
Done!
免责声明:如果侵犯了您的权益,请联系站长,我们会及时删除侵权内容,谢谢合作!更多信息从访问主页:qidao123.com:ToB企服之家,中国第一个企服评测及商务社交产业平台。
欢迎光临 IT评测·应用市场-qidao123.com技术社区 (https://dis.qidao123.com/)
Powered by Discuz! X3.4