IT评测·应用市场-qidao123.com
标题:
Compose和Android View相互使用
[打印本页]
作者:
伤心客
时间:
2024-7-30 23:17
标题:
Compose和Android View相互使用
Compose和Android View相互使用
在Compose中使用View
概述
Compose是一个全新的UI框架,虽然重写了我们熟悉的许多控件,但不可能八面见光,比如Android View中的一些复杂控件Compose并没有重写。
简单控件
属性:
@Composable
@UiComposable
fun <T : View> AndroidView(
factory: (Context) -> T, // Android View
modifier: Modifier = Modifier, // 修饰符
update: (T) -> Unit = NoOpUpdate // 加载布局后回调
)
复制代码
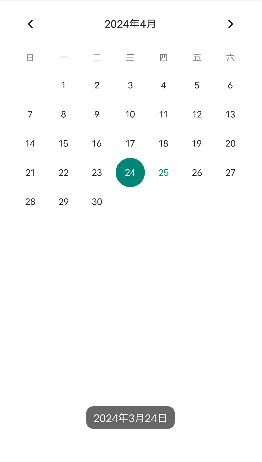
使用:
AndroidView(
factory = { CalendarView(it) },
modifier = Modifier.fillMaxSize(),
update = {
it.setOnDateChangeListener { view, year, month, dayOfMonth ->
Toast.makeText(view.context, "${year}年${month}月${dayOfMonth}日", Toast.LENGTH_SHORT).show()
}
}
)
复制代码
复杂控件
使用WebView、MapView等控件时必要在对应生命周期中调用对应方法,否则会引起内存泄漏。
在 Compose 中如果必要根据生命周期来进行不同操纵,就必要使用 LocalLifecycleOwner。通过 LocalLifecycleOwner 可以获取当前的lifecycle,然后在控件创建的时候加上监听,之后在关闭的时候关掉监听。
@Composable
fun rememberWebViewWithLifecycle(): WebView {
val context = LocalContext.current
val webView = remember {
WebView(context)
}
val lifecycleObserver = rememberWebViewLifecycleObserve(webView)
val lifecycle = LocalLifecycleOwner.current.lifecycle
DisposableEffect(lifecycle) {
lifecycle.addObserver(lifecycleObserver)
onDispose {
lifecycle.removeObserver(lifecycleObserver)
}
}
return webView
}
@Composable
fun rememberWebViewLifecycleObserve(webView: WebView): LifecycleEventObserver {
return remember(webView) {
LifecycleEventObserver { source, event ->
when (event) {
Lifecycle.Event.ON_RESUME -> webView.onResume()
Lifecycle.Event.ON_PAUSE -> webView.onPause()
Lifecycle.Event.ON_DESTROY -> webView.destroy()
else -> android.util.Log.e("TAG", "hello world")
}
}
}
}
@SuppressLint("SetJavaScriptEnabled")
@Composable
fun MyAndroidView() {
val webView = rememberWebViewWithLifecycle()
AndroidView(
factory = { webView },
modifier = Modifier.fillMaxSize(),
update = { webView ->
webView.settings.apply {
javaScriptEnabled = true
}
webView.loadUrl("https://www.baidu.com")
}
)
}
复制代码
嵌入XML布局
如果各人在重构项目时碰到复杂的XML布局不易使用Compose来构建,也可以直接在Compose中使用XML布局,不外Compose现在只支持以ViewBinding的方式构建的XML布局。
开启ViewBinding:
viewBinding {
enabled = true
}
复制代码
添加依靠库:
implementation "androidx.compose.ui:ui-viewbinding:1.3.0-beta02"
复制代码
属性:
fun <T : ViewBinding> AndroidViewBinding(
// 创建ViewBinding
factory: (inflater: LayoutInflater, parent: ViewGroup, attachToParent: Boolean) -> T,
// 修饰符
modifier: Modifier = Modifier,
// 加载完后回调
update: T.() -> Unit = {}
)
复制代码
使用:
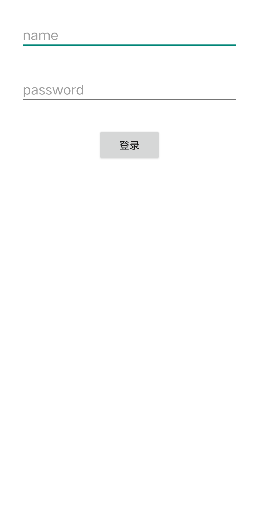
login_layout.xml
<?xml version="1.0" encoding="utf-8"?>
<LinearLayout xmlns:android="http://schemas.android.com/apk/res/android"
android:layout_width="match_parent"
android:layout_height="match_parent"
android:orientation="vertical">
<EditText
android:id="@+id/et_name"
android:layout_width="match_parent"
android:layout_height="wrap_content"
android:layout_margin="30dp"
android:hint="name" />
<EditText
android:id="@+id/et_password"
android:layout_width="match_parent"
android:layout_height="wrap_content"
android:layout_marginHorizontal="30dp"
android:hint="password" />
<Button
android:id="@+id/btn_login"
android:layout_width="wrap_content"
android:layout_height="wrap_content"
android:layout_gravity="center"
android:layout_marginTop="30dp"
android:text="登录" />
</LinearLayout>
复制代码
MainActivity
class MainActivity : ComponentActivity() {
override fun onCreate(savedInstanceState: Bundle?) {
super.onCreate(savedInstanceState)
setContent {
Scaffold(
) { paddingValues ->
Box(modifier = Modifier.padding(paddingValues)) {
MyAndroidXml()
}
}
}
}
fun doLogin(name: String, password: String) {
if (name.isEmpty() || password.isEmpty()) {
Toast.makeText(this, "用户名密码不能为空", Toast.LENGTH_SHORT).show()
return
}
Toast.makeText(this, "用户名:$name 密码:$password", Toast.LENGTH_SHORT).show()
}
}
@Composable
fun MyAndroidXml() {
val context = LocalContext.current as MainActivity
AndroidViewBinding(
factory = { inflater, parent, attachToParent ->
LoginLayoutBinding.inflate(inflater, parent, attachToParent)
},
modifier = Modifier.fillMaxSize(),
update = {
btnLogin.setOnClickListener {
val name = etName.text.toString().trim()
val password = etPassword.text.toString().trim()
context.doLogin(name, password)
}
}
)
}
复制代码
在View中使用Compose
概述
在 Android View 中也可以使用 Compose,平时编写 Android 代码的时候一样寻常会使用 Activity 或 Fragment 来展示页面。
在Activity中使用Compose
添加依靠库:
如果是新建的Compose项目,编译器会直接帮我们引入 activity-compose 的依靠;如果是老项目,就必要我们手动添加依靠。
implementation 'androidx.activity:activity-compose:1.3.1'
复制代码
通过 setContent 方式使用 Compose。
class MainActivity : ComponentActivity() {
override fun onCreate(savedInstanceState: Bundle?) {
super.onCreate(savedInstanceState)
setContent {
Text("hello world")
}
}
}
复制代码
在Fragment中使用Compose
class MyFragment : Fragment() {
override fun onCreateView(
inflater: LayoutInflater,
container: ViewGroup?,
savedInstanceState: Bundle?
): View {
val composeView = ComposeView(requireContext()).apply {
setContent {
Text("hello world")
}
}
return composeView
}
}
复制代码
布局使用多个ComposeView
如果一个布局中存在多个ComposeView,那么每个ComposeView必须有唯一ID才能使saveInstanceState发挥作用。
class MyFragment : Fragment() {
override fun onCreateView(
inflater: LayoutInflater,
container: ViewGroup?,
savedInstanceState: Bundle?
): View {
val linearLayout = LinearLayout(requireContext()).apply {
orientation = LinearLayout.VERTICAL
val oneComposeView = ComposeView(requireContext()).apply {
id = R.id.compose_one
setContent {
Text("hello")
}
}
addView(oneComposeView)
val button = Button(requireContext()).apply {
text = "world"
}
addView(button)
val twoComposeView = ComposeView(requireContext()).apply {
id = R.id.compose_two
setContent {
Text("compose")
}
}
addView(twoComposeView)
}
return linearLayout
}
}
复制代码
在布局中使用Compose
在XML布局中使用ComposeView。
通过ComposeView的setContent设置Compose组件。
布局:
<?xml version="1.0" encoding="utf-8"?>
<LinearLayout xmlns:android="http://schemas.android.com/apk/res/android"
android:id="@+id/container"
android:layout_width="match_parent"
android:layout_height="match_parent"
android:orientation="vertical">
<EditText
android:id="@+id/et_input"
android:layout_width="match_parent"
android:layout_height="wrap_content"
android:padding="30dp" />
<androidx.compose.ui.platform.ComposeView
android:id="@+id/compose_view"
android:layout_width="match_parent"
android:layout_height="wrap_content" />
</LinearLayout>
复制代码
代码:
class MainActivity : AppCompatActivity() {
private lateinit var activityMainBinding: ActivityMainBinding
override fun onCreate(savedInstanceState: Bundle?) {
super.onCreate(savedInstanceState)
activityMainBinding = ActivityMainBinding.inflate(layoutInflater)
setContentView(activityMainBinding.root)
initViews()
}
private fun initViews() {
activityMainBinding.apply {
composeView.setContent {
var content by remember { mutableStateOf("") }
Column(modifier = Modifier.fillMaxSize()) {
Button(onClick = { content = etInput.text.toString().trim() }) {
Text("提交")
}
Text(content)
}
}
}
}
}
复制代码
组合使用
现在大部分应用都是基于 Android View 编写的,而 Android View 只能显示 View,因此必要将 Compose 转为 Android View 中使用的 View。
第一步:创建Compose
@Composable
fun rememberWebViewWithLifecycle(): WebView {
val context = LocalContext.current
val webView = remember {
WebView(context)
}
val lifecycleObserver = rememberWebViewLifecycleObserve(webView)
val lifecycle = LocalLifecycleOwner.current.lifecycle
DisposableEffect(lifecycle) {
lifecycle.addObserver(lifecycleObserver)
onDispose {
lifecycle.removeObserver(lifecycleObserver)
}
}
return webView
}
@Composable
fun rememberWebViewLifecycleObserve(webView: WebView): LifecycleEventObserver {
return remember(webView) {
LifecycleEventObserver { source, event ->
when (event) {
Lifecycle.Event.ON_RESUME -> webView.onResume()
Lifecycle.Event.ON_PAUSE -> webView.onPause()
Lifecycle.Event.ON_DESTROY -> webView.destroy()
else -> android.util.Log.e("TAG", "hello world")
}
}
}
}
@SuppressLint("SetJavaScriptEnabled")
@Composable
fun WebViewPage() {
val webView = rememberWebViewWithLifecycle()
AndroidView(
factory = { webView },
modifier = Modifier.fillMaxSize(),
update = { webView ->
webView.settings.apply {
javaScriptEnabled = true
}
webView.loadUrl("https://www.baidu.com")
}
)
}
复制代码
第二步:将Compose转为Android View
class MyAndroidView @JvmOverloads constructor(
context: Context,
attrs: AttributeSet? = null,
defStyleAttr: Int = 0
) : AbstractComposeView(context, attrs, defStyleAttr) {
@Composable
override fun Content() {
WebViewPage()
}
}
复制代码
第三步:使用Android View
<com.example.app222.MyAndroidView
android:layout_width="match_parent"
android:layout_height="match_parent" />
复制代码
免责声明:如果侵犯了您的权益,请联系站长,我们会及时删除侵权内容,谢谢合作!更多信息从访问主页:qidao123.com:ToB企服之家,中国第一个企服评测及商务社交产业平台。
欢迎光临 IT评测·应用市场-qidao123.com (https://dis.qidao123.com/)
Powered by Discuz! X3.4