我们本日的主角是Gateway网关,一听名字就知道它根本的使命就是去分发路由。根据差别的指定名称去哀求各个服务,下面是Gateway官方的表明:
Spring Cloud Gateway,其他的博主就不多说了,各人多去官网看看,只有官方的才是最精确的,回归主题,我们的过滤器与断言怎样加载进来的,而且是怎样举行对哀求举行过滤的。
各人如果对SpringBoot自动加载的认识的话,肯定知道要看一个代码的源码,要找到META-INF下的spring.factories,具体为啥的博主就不多说了,网上也有很多解说自动加载的源码分析,本日就解说Gateway,全部项目三板斧:加依靠、写注解、弄设置
依靠:
- <dependency>
- <groupId>org.springframework.cloud</groupId>
- <artifactId>spring-cloud-starter-gateway</artifactId>
- </dependency>
设置:
- spring:
- cloud:
- gateway:
- routes:
- - id: after-route #id必须要唯一
- uri: lb://product-center
- predicates:
- - After=2030-12-16T15:53:22.999+08:00[Asia/Shanghai]
- filters:
- - PrefixPath=/product-api
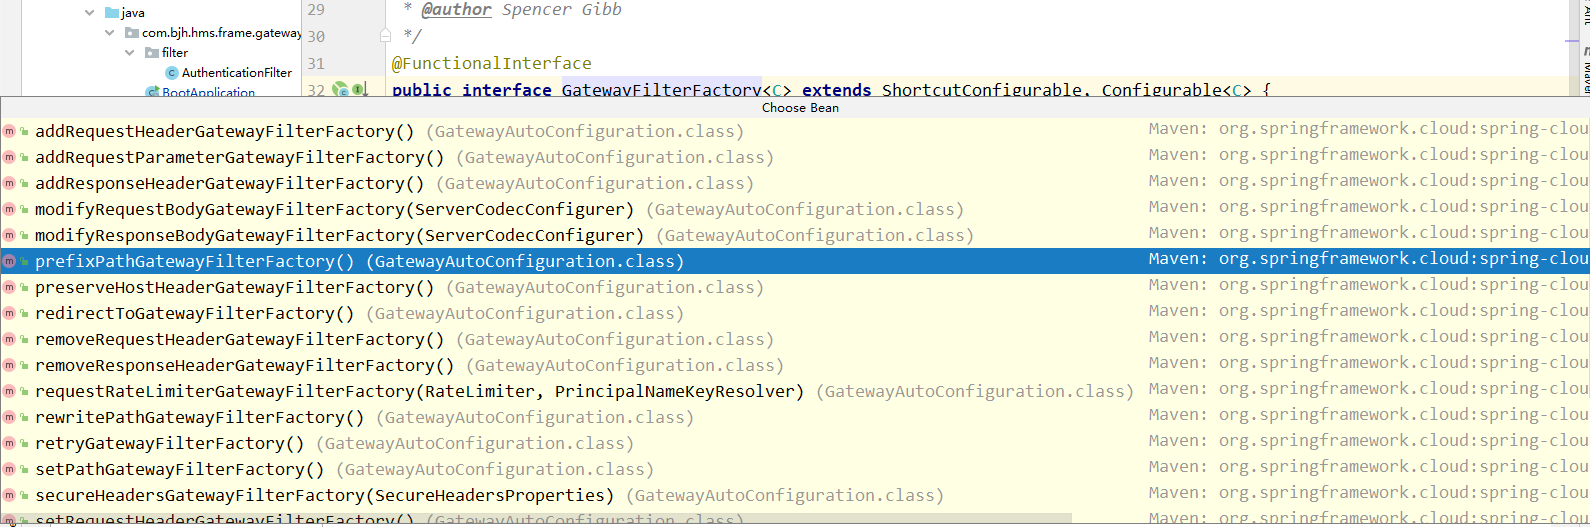
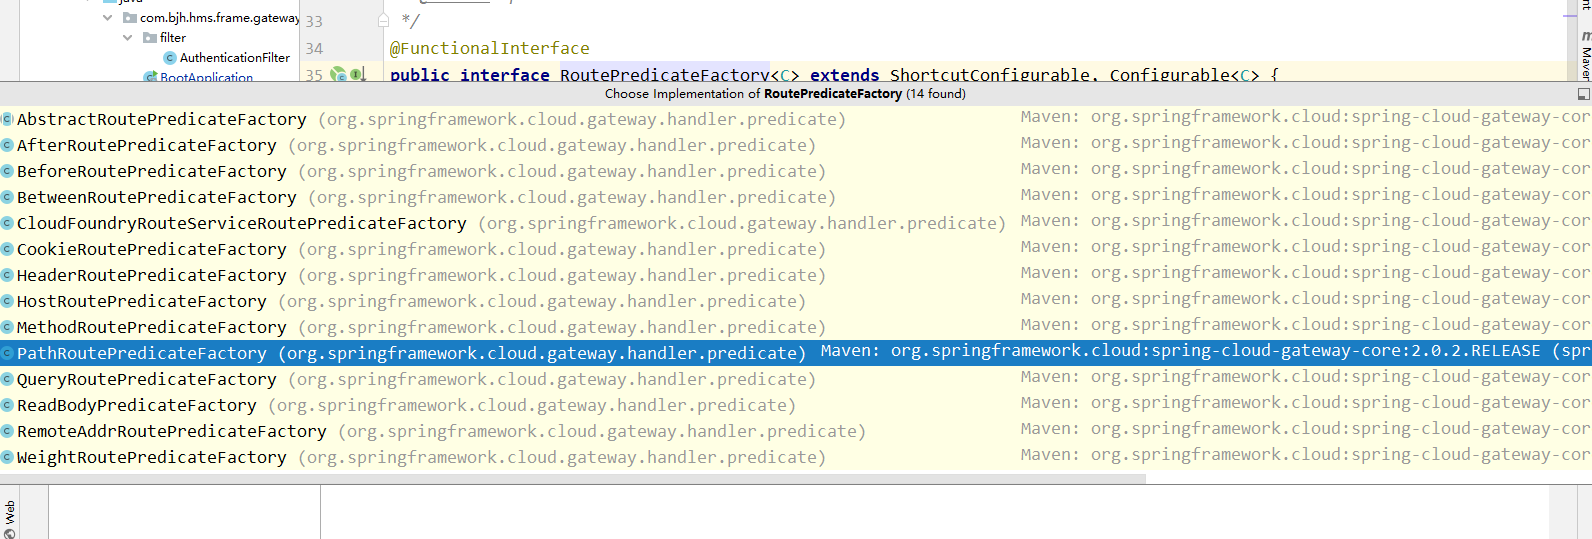
看到这里的时间,第一步就乐成了,剩下的就是找到org.springframework.cloud.gateway.config.GatewayAutoConfiguration这个关键类,我们紧张看看内里的两个类
- @Bean
- public RouteLocator routeDefinitionRouteLocator(GatewayProperties properties,
- List<GatewayFilterFactory> GatewayFilters,
- List<RoutePredicateFactory> predicates,
- RouteDefinitionLocator routeDefinitionLocator) {
- return new RouteDefinitionRouteLocator(routeDefinitionLocator, predicates, GatewayFilters, properties);
- }
- @Bean
- @Primary
- //TODO: property to disable composite?
- public RouteLocator cachedCompositeRouteLocator(List<RouteLocator> routeLocators) {
- return new CachingRouteLocator(new CompositeRouteLocator(Flux.fromIterable(routeLocators)));
- }
以是博主直接就找到了RouteLocator这个类设置,果不其然,我们找到了断言与过滤器的注入,固然着实方法体内作为参数传入,但是会被spring剖析到,直接去工厂里拿到,具体怎么拿呢?我们再来看看:
- 1 public BeanWrapper instantiateUsingFactoryMethod(
- 2 String beanName, RootBeanDefinition mbd, @Nullable Object[] explicitArgs) {
- 3
- 4 .....
- 5
- 6 for (Method candidate : candidates) {
- 7 Class<?>[] paramTypes = candidate.getParameterTypes();
- 8
- 9 if (paramTypes.length >= minNrOfArgs) {
- 10 ArgumentsHolder argsHolder;
- 11
- 12 if (explicitArgs != null) {
- 13 // Explicit arguments given -> arguments length must match exactly.
- 14 if (paramTypes.length != explicitArgs.length) {
- 15 continue;
- 16 }
- 17 argsHolder = new ArgumentsHolder(explicitArgs);
- 18 }
- 19 else {
- 20 // Resolved constructor arguments: type conversion and/or autowiring necessary.
- 21 try {
- 22 String[] paramNames = null;
- 23 ParameterNameDiscoverer pnd = this.beanFactory.getParameterNameDiscoverer();
- 24 if (pnd != null) {
- 25 paramNames = pnd.getParameterNames(candidate);
- 26 }
- 27 //主要就是会进入到这里去解析每一个参数类型
- 28 argsHolder = createArgumentArray(beanName, mbd, resolvedValues, bw,
- 29 paramTypes, paramNames, candidate, autowiring, candidates.length == 1);
- 30 }
- 31 catch (UnsatisfiedDependencyException ex) {
- 32 if (logger.isTraceEnabled()) {
- 33 logger.trace("Ignoring factory method [" + candidate + "] of bean '" + beanName + "': " + ex);
- 34 }
- 35 // Swallow and try next overloaded factory method.
- 36 if (causes == null) {
- 37 causes = new LinkedList<>();
- 38 }
- 39 causes.add(ex);
- 40 continue;
- 41 }
- 42 }
- 43
- 44 int typeDiffWeight = (mbd.isLenientConstructorResolution() ?
- 45 argsHolder.getTypeDifferenceWeight(paramTypes) : argsHolder.getAssignabilityWeight(paramTypes));
- 46 // Choose this factory method if it represents the closest match.
- 47 if (typeDiffWeight < minTypeDiffWeight) {
- 48 factoryMethodToUse = candidate;
- 49 argsHolderToUse = argsHolder;
- 50 argsToUse = argsHolder.arguments;
- 51 minTypeDiffWeight = typeDiffWeight;
- 52 ambiguousFactoryMethods = null;
- 53 }
- 54 // Find out about ambiguity: In case of the same type difference weight
- 55 // for methods with the same number of parameters, collect such candidates
- 56 // and eventually raise an ambiguity exception.
- 57 // However, only perform that check in non-lenient constructor resolution mode,
- 58 // and explicitly ignore overridden methods (with the same parameter signature).
- 59 else if (factoryMethodToUse != null && typeDiffWeight == minTypeDiffWeight &&
- 60 !mbd.isLenientConstructorResolution() &&
- 61 paramTypes.length == factoryMethodToUse.getParameterCount() &&
- 62 !Arrays.equals(paramTypes, factoryMethodToUse.getParameterTypes())) {
- 63 if (ambiguousFactoryMethods == null) {
- 64 ambiguousFactoryMethods = new LinkedHashSet<>();
- 65 ambiguousFactoryMethods.add(factoryMethodToUse);
- 66 }
- 67 ambiguousFactoryMethods.add(candidate);
- 68 }
- 69 }
- 70 }
- 71
- 72 .....
- 73 return bw;
- 74 }
- private ArgumentsHolder createArgumentArray(
- String beanName, RootBeanDefinition mbd, @Nullable ConstructorArgumentValues resolvedValues,
- BeanWrapper bw, Class<?>[] paramTypes, @Nullable String[] paramNames, Executable executable,
- boolean autowiring, boolean fallback) throws UnsatisfiedDependencyException {
- ....
- //这下就是了,每个参数都被进行解析
- for (int paramIndex = 0; paramIndex < paramTypes.length; paramIndex++) {
- ....
- try {
- //我们的参数就是在这里被进行解析的--resolveAutowiredArgument
- Object autowiredArgument = resolveAutowiredArgument(
- methodParam, beanName, autowiredBeanNames, converter, fallback);
- args.rawArguments[paramIndex] = autowiredArgument;
- args.arguments[paramIndex] = autowiredArgument;
- args.preparedArguments[paramIndex] = new AutowiredArgumentMarker();
- args.resolveNecessary = true;
- }
- catch (BeansException ex) {
- throw new UnsatisfiedDependencyException(
- mbd.getResourceDescription(), beanName, new InjectionPoint(methodParam), ex);
- }
- }
- }
- //其他不重要的,直接忽略掉
- ...
- return args;
- }
- protected Map<String, Object> findAutowireCandidates(
- @Nullable String beanName, Class<?> requiredType, DependencyDescriptor descriptor) {
- //主要的就是这个,beanNamesForTypeIncludingAncestors方法,该方法就是从bean工厂中获取所有当前类的实现实例名称,
- String[] candidateNames = BeanFactoryUtils.beanNamesForTypeIncludingAncestors(
- this, requiredType, true, descriptor.isEager());
- Map<String, Object> result = new LinkedHashMap<>(candidateNames.length);
- ...
- //遍历名称,进行实例化
- for (String candidate : candidateNames) {
- if (!isSelfReference(beanName, candidate) && isAutowireCandidate(candidate, descriptor)) {
- addCandidateEntry(result, candidate, descriptor, requiredType);
- }
- }
- .....
- return result;
- }
这下我们知道了,体系设置的断言和过滤器是怎样被加载 的了,那我们尚有一个标题,如果我自界说一个,怎样被体系辨认呢?而且怎么举行设置呢?不难发现我们之前看源码时,他是被spring通过找工厂实现类找到而且加载进来的,那我们本身实现工厂接口而且利用@Component注解,让spring加载进来不就的了吗?但是你会发现体系自界说的属性断言大概过滤器都有工厂名字的后缀,这是为什么呢?影响我们自界说 的类被加载到gateway中且见效吗?究竟是会影响,那为什么影响呢?我们照旧看源码。由于我们之前的类加载还没有看完,我们最开始的时间就找到了两个@bean 的自动加载,那这两个类实例化的时间都做了哪些工作,我们还没有细看;
- public RouteDefinitionRouteLocator(RouteDefinitionLocator routeDefinitionLocator,
- List<RoutePredicateFactory> predicates,
- List<GatewayFilterFactory> gatewayFilterFactories,
- GatewayProperties gatewayProperties) {
- this.routeDefinitionLocator = routeDefinitionLocator;
- initFactories(predicates);
- gatewayFilterFactories.forEach(factory -> this.gatewayFilterFactories.put(factory.name(), factory));
- this.gatewayProperties = gatewayProperties;
- }
gatewayFilterFactories.forEach(factory -> this.gatewayFilterFactories.put(factory.name(), factory)):跟断言的代码险些一样,由于没有其他多余的逻辑,以是没有封装到方法中,直接利用java8 的流特性,写完了遍历的过程。各人要注意一段代码就是factory.name(),这里利用了一个方法;
- default String name() {
- return NameUtils.normalizeRoutePredicateName(getClass());
- }
好了,本日就解说这么多,下次在解说gateway接到哀求后,是怎样举行一步一步过滤的,何时举行断言校验的。一次不讲这么多,消化了就好。
免责声明:如果侵犯了您的权益,请联系站长,我们会及时删除侵权内容,谢谢合作!qidao123.com:ToB企服之家,中国第一个企服评测及软件市场,开放入驻,技术点评得现金 |


 发表于 2026-2-22 02:50:45